Dimensioning consists of the following:
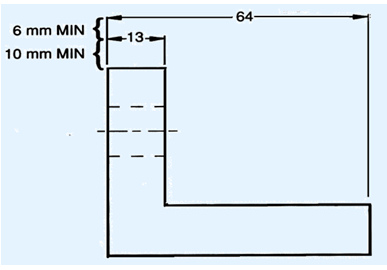
- A thin, solid line that shows the extent and direction of a dimension. Dimension lines are broken for insertion of the dimension numbers
- Should be placed at least 10 mm away from the outline and all
- other parallel dimensions should be at least 6 mm apart, or more, if space permits
The important elements of dimensioning consists of extension lines, leader line, arrows and dimensions.
Extension line – a thin, solid line perpendicular to a dimension line, indicating which feature is associated with the dimension. There should be a visible gap of 1.5 mm between the feature’s corners and the end of the extension line.Figure 5 shows extension lines.
Leader line
A thin, solid line used to indicate the feature with which a dimension, note, or symbol is associated. Generally this is a straight line drawn at an angle that is neither horizontal nor vertical. Leader line is terminated with an arrow touching the part or detail. On the end opposite the arrow, the leader line will have a short, horizontal shoulder. Text is extended from this shoulder such that the text height is centered with the shoulder line

Figure 5. showing extension lines
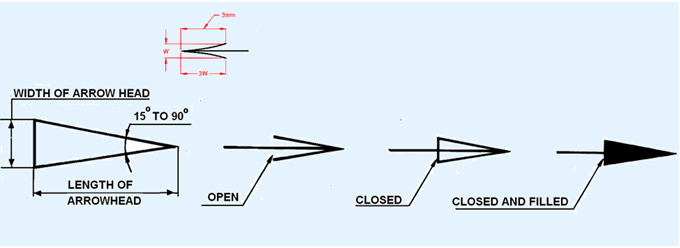
- Arrows – 3 mm wide and should be 1/3rd as wide as they are long - symbols placed at the end of dimension lines to show the limits of the dimension. Arrows are uniform in size and style, regardless of the size of the drawing.Various types of arrows used for dimensioning is shown in figure 6.

Figure 6.Various types of arrows used for dimensioning